7. How to Duplicate, Delete or Hide a Layer
Besides creating a new layer, the common operations to layers are duplication, deletion and hiding.
For example, if you want to change the content a little bit on one layer, instead of creating a new layer from scratch, you can duplicate that layer, modify it, and hide the original layer to quickly have a look at the result. If you are not satisfied with it, delete the duplicated layer and duplicate the original one again and repeat the steps until you get the result you want.

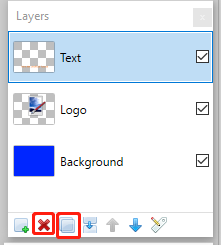
Duplicate – the “Duplicate” button is the third at the bottom of the Layers section.
Delete – the “Delete” is the second button at the bottom of the Layers section.
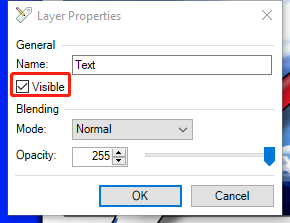
Hide – in order to hide a layer, you need to double click the layer in the Layers section to open its properties window, and uncheck the checkbox “Visible”.

8. Save your Work and Save it as PNG or JPEG
Saving your work from time to time is always a good work habit to avoid unpredictable loss.
To save your work, click “File” in the top menu bar and select “Save”. This will launch the “Save” window, where you give it a file name and click the button “Save”. Note: DO NOT change the default file type .pdn because all the layers information can only be saved in the .pdn format.
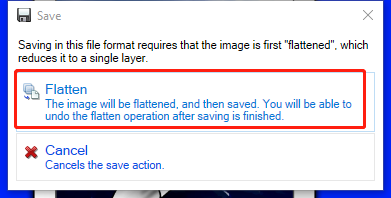
Although .pdn file format stores all information of your image including layers, you can not directly use it in web page or other applications. Instead, you should convert it to PNG or JPEG from .pdn format. In order to do so, click “File” in the top menu bar and select “Save as”. This will launch the “Save as” window, where you need to select PNG or JPEG from the Save as type dropdown list, give it a new file name and click the button “Save”. If you see a “Save Configuration” window, just click the button “OK”. Then you will see a window similar to the one below. Be sure to click the button “Flatten” and then your image will be converted to PNG or JPEG.

You can use your PNG or JPEG image now.